Saturday, May 28, 2011

A Subject for Yet Another Cloudy Night

Pittsburgh is on its way to about the tenth day in a row where the dusk brings a bank of clouds and haze from the west. So I'm going to talk about field of view, image size, focal length and image size and a cool photo-related astronomy service. Anyway, we'll start with a horribly dry and boring technical discussion having to do with optics.

Focal Length and Focal Ratio


The focal length of a simple telescope the distance the light must travel before it comes to a single point of focus in the optical system. In lens-based systems this is a property of the main objective lens. Light enters the system through the front of the lens and comes to focus somewhere in back of the lens. The distance from the focal point to the center of the lens is the focal length. Similarly with mirror-based systems the light hits the front of the mirror and then comes to focus somewhere in front of it.

The focal ratio of a simple telescope is the ratio of the focal length of the scope to the size of its aperture. So, if your Newtonian telescope has an 8 inch mirror and a 80 inch focal length, then its focal ratio is 80/8 = 10. For some reason we write this "F10" to make sure everyone understands what is going on.

Many telescopes are made up of multiple lenses, multiple mirrors, or some combination of both. My Celestron C8, for example, uses an optically neutral lens, a concave mirror and a convex mirror. The concave mirror is around F2. The convex mirror has a "negative" focal ratio of F5. I'm not sure how this is computed, since convex mirrors don't focus the light at all. In any case, this arrangement stretches the effective focal length of the primary resulting in an F10 telescope.

Why Do We Care?


The short answer is: the focal length of the telescope determines, to a large extent, the apparent size of the objects that you look at with that telescope. The general rule is this: longer focal lengths make things bigger.

If you are using your eyeballs to look through the telescope, you can't just look into the back end of the scope and see an image. You actually need a second lens to put the image on your eyeball. This lens, or set of lenses is called an eyepiece. Eyepieces come in various sizes and shapes, and since they are lenses, they have focal lengths. In general eyepieces with long focal lengths are for looking at large fields of view at low power. On the other hand, eyepieces with short focal lengths are for looking at small fields of view at high power. In other words, the final object size in your field of view is determined by a combination of the characteristics of the telescope and that of the eyepiece.

This turns out to be handy. You can carry a bunch of different eyepieces around with you and pick which one to use based on how big the object is that you want to look at. This is how things worked for hundreds of years, until someone invented cameras.

Cameras are different


Here's an unexpected annoyance when you switch from using eyepieces to using a camera: the camera always sees the same field of view. The field of view of the camera is completely determined by two measurements:

1. The effective focal length of the telescope.

2. The size of the sensor in the camera. Ok, so you might be using film, so the film size would matter instead of the sensor size. But chances are you are not, so let's forget about that.

Since the size of the sensor in most cameras is fixed, if you want to change the size of the field of view covered by your pictures, the only thing you can do is manipulate the effective focal length of the telescope. Another way to put this is that the only way to change the scale of the objects in your pictures is to change the focal length of the telescope. If you want to take a picture of something really small, you want a long focal length. If you want to take a picture of something really large, you want a short focal length.

At first this seems sort of inconvenient. Carrying multiple telescopes around is a lot harder than carrying a small bag of eyepieces. Luckily, those clever optical designers have again come to our rescue. It turns out that you can buy any number of special lenses that attach to the end of a telescope and manipulate the effective focal ratio.

Some lenses flatten the light cone and therefore stretch the focal length. We call these barlow lenses. On the other side of the coin, focal reducers make the light cone steeper and make the effective focal length shorter. Thus, as a general rule Barlows make things bigger, and focal reducers make things smaller.

Focal Reduction is Your Friend


For Mallincam use, it turns out that we are generally more interested in shorter focal lengths than longer. There are several reasons for this:

1. The chip in the Mallincam is small. In addition, the camera's strengths lie in capturing images of deep sky objects, which tend to be more extended in size than (say) double stars or planets. Therefore, generally the case that you are trying to fit relatively large objects on to the relatively small chip, so reducing the image scale is a good thing. Now, this is not always true. If you are hunting tiny planetary nebulas, you'll need to be working at a relatively long focal length.

2. Short focal lengths usually mean smaller F-ratios. From our lessons in photography we will all remember that smaller F-ratios mean shorter exposures. This is true in astrophotography too, at least for the extended deep sky objects that we tend to use the Mallincam for. Shorter exposures are always a good thing.

3. In addition to shortening exposure times, short focal lengths mean that you can get away with sloppier tracking in your telescope mount. This is because you are effectively working at a lower level of magnification, so tracking errors will not be as evident.

So Now What?


There is no lack of advice on how to combine various focal reducers with the Mallincam. Just consider this PDF file with dozens of different combinations. The available hardware for this can be summarized in the following list:

1. Reducers that attach to the back of your telescope using the standard Schmidt-Cassegrain threads. These tend to be designed specifically for SCTs, but who knows, maybe they can work elsewhere. Celestron, Meade, Antares and others all make an .63x reducer that hooks up this way. Meade also makes a .33x reducer that is designed only to be used with small CCD cameras. Conveniently, the Mallincam is just such a camera. I have a Celestron .63x which I also use with my eyepieces.

2. Reducers that attach as eyepiece filters. The best example of this is the Antares .5x reducer. There are a few others. But I have this one so I'll talk about it.

3. Special reducers made specifically for the Mallincam that thread on the front. These can be hard to come by. I have an MFR-5, which is a two piece device which I will talk about in a bit. Rock Mallin has also made an MFR-3 which was a single lens. The use of this lens is covered in the PDF I linked to above.

4. If you use Celestron telescopes, you can look into the Hyperstar system. This device lets you run your SCT at around F2, which is pretty cool. This works particularly well for larger apertures. For smaller scopes, the image scale gets to be too small to be useful.

5. Finally, various optical companies make custom reducers/field correctors just for their telescopes, usually refractors. You can find these devices made by Vixen, Astro-Physics, Televue, Borg and others. I don't have any of these (maybe soon!).

For my purposes below, I'll cover some experiments that I have done with devices that fall into the first three buckets above, since I actually own them.

Computing Effective Focal Length


This turns out to be harder than you think. You would naively hope that when you buy a focal reducer, somewhere on the box it would say something like "when you attach this to your telescope, it will cut the focal length in half." Unfortunately, it's not that simple. The effective focal length your telescope with the focal reducer added depends on the optical qualities of the reducer and on the spacing between the reducing lens and your eyeball, or the CCD in the camera. The Celestron/Meade/Antares "F6.3" reducer is specified as being a .63x reducer, but this is only actually true if the spacing is just right. If you are closer to the lens than the assumed distance (around 90-100mm, I think), then the final reduction is a bit smaller. If you are further away, then you get more reduction.

This effect is why you see so much traffic on the Mallincam groups about putting "spacers" between the camera and the focal reducer. Note that while you can get some mileage out of changing the spacing, if you get too far outside of the optimal range you will experience various optical maladies, the most obvious of which will be light fall-off in the corners of your picture. The more you push the reduction the worse this gets, since the steeper light cone will inevitably can only cover a smaller image area. This is why reducers like the Meade .33x can only be used with small chip CCDs. Put anything bigger behind it and you get dark corners.

In addition, you may have trouble focusing your telescope and you may find that the image at the edges of the field of view are distorted in strange ways. These issues all reflect the fact that the focal reducer is working against the laws of physics and trying to get you a free lunch.

Now, there are some optical formulas that let you plug in the focal length of the focal reducer and the spacing and compute the effective focal reduction. However, these are of limited use for two reasons:

1. Focal lengths tend not to be specified, and measuring the spacing is hard.

2. The formulas go out the window if you use multi-lens systems. This is because you can manipulate the spacing in multiple places and wen you do that who knows how the reduction factors combine. The MFR-5 has this problem since you can put spacers between the two lenses or just after them. You can also end up confused if you combine the Celestron .63x reducer with another lens.

A better way to figure out what your effective focal length is is to just use the camera to take a picture and then compute the field of view of the picture. If you know the field of view covered by the picture and you know the size of the CCD you used to take the shot, then you can solve for the effective focal length. Now, you might ask, how do you compute the field of view covered by a picture? Here the Internet comes to the rescue. All you do is this:

1. Join Flickr.

2. Joint the astrometry Flickr group.

3. Take your screen gran and add it to the group's pool.

4. Wait.

If your shot is clean enough, the bot that watches the pool will grab it and compare it against a huge database of star and object positions. Usually it will then tell you what part of the sky you took a picture of and the size of the field of view covered by your photo. I have a few examples here in my Flickr page. This one is the best:


m82 Screen shot 2011-05-05 at 10.52.31 PM


Note the comment from the Astrometry bot. It tells you the coordinates of the center of the photo, the size of the field, and even all of the interesting objects in the picture, in case you didn't know. This is fantastic. Anyway, I take the field of view and then use Skytools 3 to match it with the right effective focal length. Skytools has an engine that will show you the field covered by your camera at a given focal length, so you can just plug values into that until you get something that matches. If you don't have Skytools there are any number of other package that do this, including some handy web pages.

Using this scheme, I have tested the following configurations of focal reducing lenses, and computed the efective focal length for each one:

1. The Antares 1.25" .5x reducer. This one is designed to be used with around 50-60mm of extension. I did not have quite that much, so in my pictures the effective F-ratio (with my C8) is about F5.5 instead of F5.

2. The MFR-5 with a 5mm spacer between the lenses. This gives you F5.

3. The MFR-5 with a 10mm spacer behind the entire assembly. This gives you F3.5 or so. This combination also produced obvious vignetting.

4. Finally, the Celestron .63x combined with the front lens of the MFR5 the standard 1.25" diagonal. This also gave me around F3.5. I used this odd combination because I fit in my diagonal without bottoming out on the mirror. Since I switched to the GEM I stopped using the diagonal so this is not that critical anymore. Still, it's a nice combination.

The next test I plan to run if I ever get a clear night is to combine the .63x reducer with the Antares. I expect to get to around F3.5 or hopefully a bit less. I might also try the Meade .33x focal reducer.

In my telescope, I find that F3.5 is nice because everything is a bit brighter, but the image scale at F5 has been better for the smaller galaxies that you tend to look at in the Spring. Your mileage will vary according to the aperture of your telescope and the quality of your mount.

I will note here that my measurements of the MFR-5 do not match what appears on the various Mallincam web sites, in the Internet forums and in the camera's documentation. I have no insight into why what I found was different, but my numbers are consistent and I'm fairly confident that they are right.

Summary


1. Focal length determines field of view and therefore image scale in the camera. For the Mallincam, shorter focal lengths tend to give you a better image scale.

2. Shorter focal lengths also reduce your focal ratio and therefore your exposure times.

3. Focal reducers can do their job well, but only under certain constraints, like spacing and the size of the final image circle.

4. With an 8 inch SCT telescope, working at F5 to F3.5 is a good range of focal lengths. Any shorter and stuff gets too small. If you need to go wider, it's probably wiser to get a wider field telescope.

Wednesday, May 4, 2011

Late Night with the Mallincam

If there is one thing that I have learned in my now medium-long lifetime it's that in Western Pennsylvania you cannot count on clear skies lasting. So when the clouds parted last Friday night at 11:15pm, I had a short quandry. On the one hand, it was 11:15pm and I should be in bed. On the other hand, it might be the last window of clear sky for another month. April to this point had been nothing but gray skies, cold, and rain. After considering this for about 45 seconds, I started to set up the telescope.

As this was my second time out with the new mount and as the first time had gone pretty well (got set up and aligned in about 20 minutes) this time things went less smoothly. To make this work well, you need script and a list. And I forgot a few parts of the script. Here is how you set up.

First, we need short tangent on what we want the mount to do for us when we are done. By convention we keep track of the position of every cataloged astronomical object that we deal with using something called the equatorial coordinate system. This coordinate system is similar to the one we use on the Earth, with the longitude and latitude, except it that it's projected on the sky. The east/west coordinate, similar to longitude, is called Right Ascension or RA. I don't know why. RA is measured like time, in hours, minutes, seconds and so on. This turns out to be convenient because you are often interested in the time at which objects are visible or not. If you know the time of year and the RA of the object, you can compute whether or not you should be able to see it.

The North/South coordinate, similar to Latitude is called Declination, or DEC. This coordinate is measured in the familiar degrees, minutes, seconds, and so on.

Our equatorial mount, unsurprisingly, has two axes that go by these same names. The right ascension axis is also called the polar axis of the mount.

The eventual goal of the setup is to align two things. First, we want to align the polar axis of the mount with the polar axis of the Earth. This alignment is called polar alignment and allows the mount to track objects in the sky while only driving the telescope along one axis.

Second, we want to give the mount's computer an accurate picture of what is where in the sky so it can point the telescope automatically. I call this star alignment to distinguish it from polar alignment. When we are done, we should be able to tell the mount to point the telescope anywhere we want in the sky, and it can do some quick calculations to figure out exactly how to run the motors to pull that off. Then we sit back and watch the object come into the field of the eyepiece, or camera. So, here we go.

1. Take the mount outside. Point the right ascension axis of the mount roughly north.

2. Attach the counterweight on the counterweight thingy.

3. Go back inside and grab the telescope. Attach the telescope to the mount using the quick release dovetail arrangement.

4. Balance the scope and the counterweight along the right ascension axis. To do this on my mount, you release the clutch on the RA axis. This lets you turn the mount by hand rather than with the motors. Now turn the mount until the shaft is horizontal and gently let go. If the telescope drops, move the counterweight further away from the telescope and try again. If the counterweight drops, move it closer to the telescope and try again. Iterate until the whole system is balanced.

5. Now balance the telescope along the declination axis. Tighten the RA clutch. Carefully loosen the DEC clutch turn the telescope until it is horizontal. Slooowly let go and see how the tube moves. With the Celestron telescopes you can then move the scope backward and forward in the quick release saddle until it balances.

6. Now turn the mount until the little index marks line up. When you are done doing this the scope is in its "zero" position and should be pointing North. If it's dark enough you can look in the finder scope and maybe see Polaris. Resist the urge to center Polaris in the finder. This will do you no good because the axis of the finder is not what you want to point at Polaris. I shoud know, I wasted my time doing this.

7. Instead what you want to do is look through a hollow in the RA axis and put Polaris into that hole. Then you know the polar axis is looking roughly at Polaris, which is more useful. To do this, loosen the DEC clutch and turn the tube to 90 degrees from where it was. You should now be able to look through the hole and see sky.

Get down on your knees and push the mount around and peer into this hole and see if you can see Polaris. It might take a few tries before you can see anything, depending on how dark it is. If you can't see it, use the following odd scheme to find it. First, you will note two long bolts with handles on them on the front and the back of the mount. These adjust altitude. They do not do it very well. In particular, it's hard to smoothly lower the altitude. So, on the theory that you are pointed too high, loosen the front lever and push the mount so it falls down a few degrees in altitude. Then, using the back lever raise the mount again and hopefully you'll see Polaris enter the field. If not, you might be off to the side a bit. Shove the mount sideways one way or another and try again until you get Polaris in the hole. The field of view through this hole is pretty wide so this isn't too hard.

8. Also on the front of the mount you will notice two knobs that push the mount side to side. If Polaris is not centered side to side in the hole, use these knobs to move it around. To move the mount you loosen one knob and then tighten the other one. I don't remember how things are oriented so you will just have to try yourself until you figure it out.

Starting with Polaris roughly in this hole turns out to be important. In my short experience, if you are too far off the star alignment which I will describe next never ends up working.

9. Now turn the scope back to the zero position and plug in the power cord. Answer all the questions about time and date and such that the hand controller will ask you and start the two star alignment. Tell the mount to move the scope to the first star it suggests. If you can't find that star or its blocked, hit the undo key to try other stars until you get one you like. The mount will point the telescope at the star you picked and then you will use the arrow keys on the hand control to center the star in your finder then the eyepiece. The Celestron manual tells you to always make sure the final movements of the stars are driven by the Up and Right arrow keys. This minimizes the resulting backlash in the gears. I have no reason to doubt the manual on this point, so be careful about that.

The mount will then let you repeat this process on a second star. You will notice that by default both of these stars will be chosen from the western part of the sky. After you are done, the hand controller will ask you if you want to add "calibration" stars, all of which will be chosen from the eastern part of the sky. You can add up to four of these stars. Keep adding them until the pointing gets very accurate.

There are two important things to know about this procedure:

First, the east/west breakdown is important for mounts like the CG-5. The CG-5 is what we call a "German Equatorial Mount", or GEM. The geometry of the GEM is such that you have to be aware of the relative position of the telescope and an imaginary line called the meridian. The meridian is the line that runs North/South and splits the sky in half East/West. If you have set up your mount correctly, the middle of the tripod sits right on top of the meridian, and in a GEM this means that the scope is on one side of this line and the counterweight is on the other. The thing you have to remember is that GEMs have a hard time tracking past the meridian because when you go too far either the scope or the counterweight shaft will run into the mount. Bad news.

To get around this problem GEMs flip the scope around whenever they cross the meridian. You want to be able to do this and maintain pointing accuracy, so the Celestron software does allows you to do extra calibration to make sure this works right.

The second thing to remember about star alignment is not to try to do it when there are thin clouds around. This makes it easy to guess wrong and align on the wrong stars, or stars you cannot see. Then no matter how many stars you align to, the pointing never gets any better. If you notice this happening, the best thing to do is to reboot the mount and start over. I ended up in this situation at about 11:45pm. By then the sky had really cleared, so I buckled down and tried again. I turned the mount off, made sure that I got Polaris into that damned hole, and started again. Ten minutes later I was ready to move on.

10. Having fine tuned your star alignment, you can now engage a nifty little piece of software that is unique to the Celestron controllers. It is called "all star" polar alignment. Pick one of the stars that you used for the final calibration as long as it is not too close to either due North or zenith. Hit the Align button on the hand controller and navigate to the Polar Align menu and then choose Align Mount and hit Enter. The mount will think a bit and then move the telescope to point at the star you just picked. Use the hand control to center it just like you did before. When you are done, you tell the hand controller to start the Polar alignment. The telescope will think a bit and then move to another spot in the sky. This is where the alignment star would be the mount were in fact polar aligned. Now you get to get down on the ground again and use those knobs and levers from before to push the mount around in azimuth and altitude until the star is centered in your eyepiece. When you are done hit the Align button and you are done.

By this time your knees and shoulders should be a bit sore, but your mount will be well aligned for both pointing and tracking. I managed to get to this state by about 12:15am. So then I yawned and went in and got my camera.

While the CG-5 mount is bigger, heavier and more complicated than my old 8SE mount, it does have its advantages. First, I have found that the tripod is much more solid, so the telescope does not shake and shimmy when I'm trying to focus. Second, it's a lot easier to use the camera because I can stick it into the back of the telescope without worrying about it hitting the base of the forks. On the other hand, there are some things you want to be careful about.

If you do not firmly attach your eyepiece to the telescope, you may find that the mount can make it fall out as it turns and twists the telescope at all strange angles. This is bad. You may also find that the various cables that stick our from various ports in the mount and lodge themselves between the motor housings. I've had this happen twice now and I'm not sure why, but it does make the mount upset. Try to avoid this.

Luckily, on this night, with the time nearing 12:30am, I had none of these issues and was able to happily go to my first target, the galaxy NGC 2903. There are two things to note here. First, you can see the cool spiral arms of the galaxy. Second, even with about a minute of exposure, the mount is still tracking pretty well. I have found in general that a minute works well. Two minutes is a bit too long.


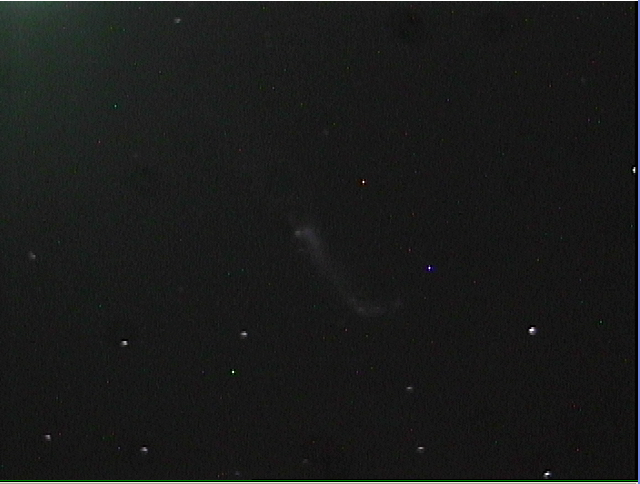
Second target of the night was the "Hockey Stick" galaxy, NGC 4656. This is a pretty dim object, I was happy to get a good view of it.


I then cruised through the galaxy clusters in Virgo and Coma Berenices. There was M64, M84, M86, M87, and M91. For two hours, everything I asked for hit right on the camera and the mount tracked with relative smoothness. I was using the camera with a .5x focal reducer, which means that the effective focal length of the telescope was 1000mm instead of 2000mm. This means that the field of view of the camera is roughly 20 by 15 arc minutes, which is pretty darned small. Overall I remain impressed by the ability of a 25 cent embedded processor to accurately point a 15 pound telescope with this level of accuracy.


Somewhere around M87 I noticed the pictures looked funny, with ugly bloated stars. I didn't think about it too hard until I tried to look at M101 and it was all blurry. So, I turned the telescope to the globular cluster M3 and tried my best to refocus.


Having gotten closer, I went back to M101 and got the surprise of the night. Most of the objects I had looked at had been small with bright cores but not much in the way of larger scale detail. M101 was different. The arms spread out over the field of view with dim hints of dust lanes and other grand details.


I finally shut down for the night at 2:45, sleepy but pretty happy. I was also hopeful that with a bit more practice I'd be able to tease even more out of these objects sitting above me in the sky. Who would have thought you could see this much with relatively little work in your backyard.

Friday, April 22, 2011

The Mount

It clouded over in my yard, so I'm writing this instead of fiddling with my telescope. Aren't you lucky.

First, some background. As I mentioned before, the Mallincam is a device that is something of a hybrid. On the one hand it is a long exposure camera not completely unlike the CCD cameras that astrophotographers use to collect data over long hours. On the other hand, the Mallincam is a device that is meant to be used for visual observation. That is, it shows you your pictures as immediately as possible, rather than making you wait for a computer and Photoshop to chew on the RAW pixel data for a few hours. Still, the some of the magic of the camera is in the fact that the camera can take long exposures. And here is where our story starts.

You will recall that telescopes made up of an optical tube sitting on a mount. The mount keeps the telescope off the ground, facilitates aiming the telescope at what you want to look at, and also keeps the telescope reasonably still so that the image is stable and easy to look at. When you look through a telescope with your eyeball, this is about all you need. You point the telescope, look for a while, repoint the telescope as the object moves out of the frame, and then look some more. The object moves because the Earth rotates.

Many modern mounts have mechanisms to compensate for this. What you do is stick motors into the mount that slowly move the telescope in a direction which is exactly opposite to that of the Earth's rotation. Then whatever you put in the eyepiece will just sit there and let you stare at it as the motion of the telescope exactly compensates for the motion of the Earth.

Now, the mount I bought can perform this trick. It has two motors, one for the "altitude axis" (moves the scope up and down) and one for the "azimuth axis" (moves the scope left and right). By driving these motors just the right way, it can track an object pretty well for hours at a time. While this worked fairly well, there were a couple of small problems. The tripod was a bit shaky, especially when focussing the telescope at high power. Pointing at objects near zenith was always stressful because you are never sure if the telescope will clear the base. Finally, using the hand controller to move the mount in small motions could be frustrating sometimes. Because of the way the gears work, objects might not move even if you held the button down for a long time, and then they might leap off in random directions. You learned to cope with this.

When I hooked the camera up to the telescope, all of these small problems were amplified. In particular, the little mount with its motors and gears tracking the sky in two directions at once just was not precise enough. If you pushed the exposure past 15 or 20 seconds, instead of nice round stars you'd get little mini star trails, like this:


This just gets worse as you get into longer exposures. And it gets even worse near zenith. Finally, I had occasional problems with the mount just going nuts and driving off into never-never land. It would happen occasionally, but with no real pattern. Which was annoying.

So what is to be done? I never thought it would come to this, but what is to be done is to buy an equatorial mount. An equatorial mount has its axes tilted so that one can be perfectly aligned with the rotational axis of the Earth. In the northern hemisphere what this means is that you can take one of the axes and point it right at the north pole. Then you can compensate for the motion of the Earth by moving the telescope around a single axis. In theory this solve the jaggy tracking problem and as a bonus you also solve the field rotation problem. Here is a schematic diagram of the idea, along with pictures of a few styles of mount:


The axis of the mount that points at the pole is called the "polar" or "right ascension" axis. The axis that points north and south is called the "declination" axis. This is a reference to the celestial coordinate system which I won't get into here.

I have never liked the idea of equatorial mounts. When I think of EQ mounts, I think of huge Newtonian reflector tubes pointing off in all strange directions and the men in white coats from the Meade ads in the 1970s. Like this:


Equatorial mounts are also more complicated. There is the whole business of polar alignment. The descriptions of this technique on the Internet range from fairly casual to mind bendingly complicated. As we all know, the only thing I fear more than men in white coats is extra complexity.

After some thought and consideration, I decided that polar alignment didn't seem that much more complicated than the star alignment procedure that I was already performing with the little alt-az mount. So I examined the market for mounts in detail. The most popular sort of equatorial mount by far is the so called "German Equatorial Mount" or GEM for short. A GEM puts the telescope on top of the two axes of rotation, with a counterweight on the other side. Like the huge Newtonian in the picture above.

So, which GEM to buy, that's the real question. The answer, like all answers, depends on what you want to do with the thing. Mounts are easy to characterize based on three mechanical parameters:

1. How much does the mount weigh?

2. How much weight can the mount hold in a stable fashion?

3. How long and how smoothly does the mount track?

In the computer era though, there is a fourth consideration that throws things off:

4. How good is the software that comes with the mount?

In general you will find that in terms of mechanics you get what you pay for. There is a direct and linear relationship between how much money you spend and how well the mount will hold weight and smoothly track the sky with the least amount of fuss. When you spend more money you get more reliable machinery that is built to a higher standard of precision. Those gears in the motor drive will be asymptotically closer theoretical perfection. More importantly, by building in small numbers the premium manufacturers can maintain a tight hold on testing and quality control.

My main requirements in a mount are not all that stringent. The most important thing is that I be able to carry out into the yard relatively easily. I don't yet have my remote control telescope bunker so I need something portable. Beyond that, I have a pretty light telescope and I only need to track for short periods of time. I can also tolerate the occasional sloppy frame. I'll just wait for the video camera to capture the next one a minute or so later. No big loss. As far as I could see, the mount landscape breaks down like this:

1. Cheap, light, and mechanically barely acceptable, but great software: Celestron CG5. This mount is made in China. If you look it up in Goggle you will find reams of material about how to rebuild it to be better. But, the Celestron hand controller is excellent. More on this later.

2. Medium expensive, heavier, better mechanics, worse software: Orion Sirius, or its bigger brother the Orion Atlas. You can get the mechanics of the Atlas with the Celestron software by buying a Celestron CGEM. These mounts are actually made by the same Chinese company that now owns Celestron. Strangely, they have not unified their software platform. Also, these mounts weigh 30-40 pounds and are probably too heavy. iOptron also has a nice mount in this class. But it is fairly new, and you should never buy anything too new, especially where embedded software is involved.

3. Premium expensive artisanal American made: Losmandy. These mounts are well liked for their build quality and overall polish. But, the software is written by one guy in his garage in his spare time. Currently the entire line is crippled by the fact that the hardware that runs the current firmware platform is obsolete. So, the one guy has been frantically rebuilding the software platform in a grand version 2. But it won't be ready for months, maybe a year. So the result is that you can now spend $2500 to $4000 on a great mount, and then wait a year for the software you need to use it to come out of beta.

4. Mechanically perfect, will just work out of the box, costs as much as a small car: AstroPhysics Mach 1. These cost ten times as much as the Celestron. As a result, everything mechanical is just better. It's beautifully machined. It has easy to use knobs that are never sloppy. It's ergonomic. It holds as much as a CGEM (say) while weighing a lot less. The tracking is up to an order of magnitude better. But the software is somewhat worse. In particular, the pointing and alignment code seems distinctly primitive compared to what Celestron does with their ten cent 16-bit embedded hand controller. This is sort of astounding when you think about it.

You can get other exotic mounts in the AstroPhysics price range from places like Paramount, Takahashi, and others. Those are mostly large mounts for permanent obervatories. Takahashi does make a smaller mount that only costs as much as a used car, but it requires a laptop for automatic pointing. I also forgot to mention the various Vixen mounts. But they use a freaky mini-laptop for a hand controller that seems to get mixed reviews.

What's clearly going on here is that mounts have changed from being something that was predominantly mechanical to something that is a mix of gears, motors and software. But, the people who make mounts have a background primarily in mechanical engineering, not software. It boggles my mind that we can't get an Astrophysics mount that runs the Celestron software. Because that would rule.

So since I didn't want to blow the entire college fund on a mount, I got the lightest one with the best software. I only need the mount to hold my relatively light telescope and track for relatively short periods of time (1 minute, maybe two on the outside). And, my tracking requirements are not that stringent. The Mallincam is not a high resolution device, so if I get a few fat stars on the TV screen I won't mind much.

I came close to getting the Sirius because I had seen it track very well with a load much larger than mine. But I ultimately didn't because I wanted to stick with the Celestron software. It's more important to me that the software in the hand controller be able to build a good pointing model with a minimum of fuss, and the Celestron stuff has proven that it can do so. Even better, the Celestron software can even help you polar align the mount by looking through the telescope rather than some crappy polar scope sitting in the RA axis. Every mount should be able to align itself this way. I don't want to spend my nights trying to find polaris while on my hands and knees on the driveway.

After all that overthinking, I got the CG-5 from B&H on a sunny Friday:

Under a full moon on a clear Friday night, I set it up and got everything aligned in about 15 minutes. That process goes like this:

1. Put the mount outside and hook it up to the battery. Point the RA axis roughly towards the north and set the latitude to roughly the altitude of Polaris. Don't sweat this. Then turn the telescope so it is also pointed north, parallel to the RA axis.

2. Put in time and location info.

3. Start the star align. The telescope will suggest stars and actually move to the first one by itself! This is an improvement over the SE mount, where you had to point at the first star by yourself.

4. Center the first star in your eyepiece. Hit Enter then Align.

5. Repeat three or four times. Now the telescope can point at almost anything accurately.

6. Now hit "Polar Align" on the hand control. The telescope will point back at the last star you aligned on. It will think for a bit and then point to the spot in the sky that the star would be if the mount were correctly polar aligned. At this point you use the knobs on the mount head to move it in altitude and azimuth until you have recentered the star in your eyepiece. This is the most painful part of the process because the knobs on the CG-5 are not great. The altitude knobs in particular are awful. The only way to adjust the altitude down is to back out the front knob and let the mount fall down. Really, I'm not kidding. The knobs on the AstroPhysics would be ten times better.

7. When you are done with the knob dance, hit Align. You are now decently polar aligned, and you didn't even have to crawl under the telescope to try and look through a crappy polar axis finder. At this point you may need to redo some of the pointing alignment (steps 3-5). But I didn't have to my first time out.

It took a little while to figure out the mechanical controls to get the mount polar aligned. But it wasn't too bad. The Celestron polar alignment scheme is really nice IMHO. I think it should be required by law in all computer controlled EQ mounts. It's also nice to have the scope track while you center alignment stars. This will make it possible, I think, to do alignments with the video camera already in the telescope. Finally, damned if the thing didn't track smoothly enough for about a minute when I was all done.

I guess I don't need to fear the complexity of the GEM, or those guys in the white coats any more. Maybe in a few years I'll blow the college fund to get perfect tracking for five minutes at a time.

Monday, April 4, 2011

A Mallincam Tutorial

I recently chronicled, in horrific detail, the steps I took to gently re-enter the world of astronomical observation. At the end of the episode, our dorky hero had become proficient with the modern telescope and its associated tools. Having gained this comfort with the tools, I took the next step and ordered my camera.

Having received the camera and used it for a while, I thought I'd try to fill a small hole in the Mallincam literature: the lack of a comprehensive tutorial. So here I've tried to tie together a lot of the disparate reference material and user manuals come with the camera and which are also on on the Internet in various forms. To do this I've drawn on the knowledge and experience of many people, especially all the guys (Rock, Don, Chris, Jim and all the others) at the Night Skies Network. I got the idea to write this after Don did an impromptu video presentation of this material one night on the web site.

So first we should review exactly what a Mallincam is. We should do this because the web sites that sell it, while enthusiastic, are not altogether clear about exactly what the device does, and how it is different from other imaging systems.

The Big Picture


Back in the old days, if you wanted to see more than was possible with just your eyeball and a telescope, you could attach a camera to the scope and take tediously long exposures on photographic plates or small pieces of film. Film, sadly, has limited sensitivity, which meant that if you wanted to pursue this line of work, you were often doomed to sit in the cold for hours gently babysitting your telescope as it erratically tracked the heavens.

When semiconductors and computers came along, astrophotographers were freed to capture light onto much more sensitive CCDs and also to use a computer to gently babysit the motion of the telescope. Still, since they are an odd bunch, the imagers were still happy enough to sit by their machines for the same long hours collecting data, and creating ever more fantastic pictures on their computers after the fact.

What was missing was a way to see more without all those hours of work. This is where the Mallincam and cameras like it come in. The Mallincam is an extremely sensitive CCD video camera that can also take relatively long exposures of deep sky objects. Its hybrid of CCD imaging hardware combined with real time video output lets you take time exposures without all the bother of digital image processing. The camera does that work for you so you can look at the object in the telescope.

Here is how it works: you attach it to your telescope on one end and a TV on the other. You tell the camera to expose for some number of seconds (mine can go from three seconds to about two minutes). Then, after each exposure period, a picture of what the telescope is pointing at appears on the screen. This picture stays on the screen until the next exposure, or integration is complete, at which time the screen refreshes and you get another image. And so it goes.

You don't need a computer. You don't need any image processing software. With 15 to 20 second exposures you can see more than you ever would in an eyepiece, and yet the whole experience is fairly close to real time. It's important to emphasize that this represents a rather novel new way of working in astronomical observation. It's similar to visual observation in you generally work in almost real time. But, it's also similar to digital imaging since the camera can capture so much more than you can see, especially under suburban skies. I think it is this hybrid nature that makes the Mallincam (and the similar Stellacam, described here) such an exiciting new class of astronomical devices.

Anyway, let's walk through how it works. What I'm going to describe below is the basic usage of the Mallincam VSS+ camera. Rock Mallin actually makes four different models of video cameras. There is the Junior, the Hyper Plus, the VSS+ and the new Xtreme. You can check out his web site to work out the differences between all the models.

This tutorial also concentrates on the direct on-camera control interface. I prefer to control the camera directly rather than use the Windows software to do it. Using this information it should not be hard for one to figure out what the same settings mean in the control software. Also, the VSS+ is similar but not identical to the newer Mallincam Xtreme. I'll point out some differences at the end.

Focal Length and Image Size


Before we get into how the camera works we have to deal with the issue of image size. The sensor in the Mallincam is pretty small. It's a so called "1/2" size CCD. No one really knows what this means, except to say that the chip is small. 8 inch Celestron telescopes have a pretty long focal length, and if you just stick the tiny CCD at the end of the tube, it is not going to see much of the sky at all.

Luckily there is an optical trick we can play. If we stick an extra lens, or lenses in front of the camera that focuses the cone of light coming from the telescope more quickly, then we can reduce the effective focal length of the telescope. This has two effects. First, it makes the tiny chip cover more sky. Second, it allows us to take shorter exposures, since the rule we learned from camera exposure still applies here. A shorter focal length means a smaller "f-ratio", which means faster pictures. There are various devices that can be used to perform this magic. Rock Mallin makes two reducers specifically designed for his cameras: the MFR-3 for Newtonians and the MFR-5 for SCTs. I picked up an MFR-5 and use it in a configuration that reduces the focal ratio of my telescope from around F10 to around F4. This turns out to be a pretty good general purpose image scale. Most objects are neither too large to fit nor too small to be seen at all.

We could actually spend an entire article discussing nothing but the mechanics of focal reducers. But I'm going to leave the rest of the details alone for now.

Camera Basics


Now we are set to figure out exactly how to use the camera you just bought. The camera comes with a short manual with tiny screen shots describing various menu systems containing many strange words in all-caps.


Alternatively, you can use a custom piece of .NET software to set most of these same parameters (still named in all-caps).


Luckily, the relative obscurity of these three letter acronyms covers up what is a fundamentally simple mechanism. There are four basic parts to the Mallincam engine.

1. The exposure engine. The good news is that the camera can take exposures from 1/12000th of a second to several minutes. The bad news is that there are three menus that you have to navigate to make it happen. I will discuss these menus below. The relevant acronyms are ALC/ELC, SENSE and SYNC.

2. Amplifier Gain. This is called AGC.

3. Other image processing parameters like white balance, gamma, and something akin sharpening (APC).

4. Cooling. Cooling is controlled using the MOTION DETECT menu. Even though it has nothing to do with motion detection.

Exposure


Probably the most confusing and somewhat byzantine aspect of the camera is how the exposure systems are interlocked. There are, sort of, three exposure systems in the camera, and three menus to control them.

Recall how the main menu of the camera looks:


The SYNC setting determines whether you are in (essentially) in short exposure mode or long exposure mode. The short exposure mode is for integrations up to 2.1 seconds. To set this you set your SYNC to VBS:


Now you can set the exposure time two ways. The ALC/ELC menu is for setting the shortest exposure times. If you are going to use the camera for very bright objects like the moon or planets this is what you use. To use ALC, you use the little buttons on the camera (or the auxilliary control box, I'm not a masochist) until the arrow points to the "ALC/ELC" menu:


Then you hit the center button to get into the settings screen. Here I have the shutter off:


And here I have the shutter speed at 1/1000th of a second:


In addition, you set the SENSE menu to OFF. We'll talk about the SENSE menu later:


Shutter speeds range from 1/100th to 1/12000th of a second. In earlier cameras, the level bar also affected the exposure of the final image, but I don't think that setting has any effect in the VSS+. I don't use the ELC mode at all, so I'm not going to tell you how it works here.

If you set the ALC shutter to OFF you enable the use of the SENSE menu to set longer exposures of up to 2.1 seconds. In this mode, the final video frame is generated by integrating multiple frames together. The exposure time is expressed as an even multiplier whose value is between is between 2x and 128x. Here we have it set to 32x:


and 128x:


At 128x, or 2.1 seconds, you have enough exposure to see most of the stars you would see in an eyepiece and some of the brighter deep sky objects.

Finally, the SYNC setting controls whether you use the extended exposure engine, which is also called "Hyper" mode.

You turn on hyper mode by doing three things:

Turn off the ALC exposure mode:


Set SENSE UP to 128x:


And then set the SYNC to INT:


At this point, the exposure that the camera uses is controlled by the little knob on the side. Every time a new frame is ready, a yellow light on the back of the camera will blink. You can use this light to figure out what your exposure is. When you turn the knob all the way counter-clockwise and you get a 3 second exposure. Turn it all the way clockwise and you get 56 seconds.

Finally finally, if you set SYNC to LINE, the exposure set by the knob is doubled:


Isn't that simple? Having covered how the engine works, the instructions that come with the camera now make more sense. For example, there is the sheet that tells you to set the menus this way when you turn the camera on at the start of the night to set up:

SENSE = 128x
ALC = OFF
SYNC = VBS

What this means is "take quick 2.1 second exposures", which is exactly what you want for initially setting up and aligning your telescope.

Meanwhile, for lunar and planetary work, the cookbook settings are

SENSE OFF
ALC = 1/100th to 1/12000th (probably around 1/1000th).
SYNC = VBS

This sets the camera up to fast exposures on bright objects.

Finally, for bread and butter deep sky work, you set the camera up like this:

SENSE = 128x
ALC = OFF
SYNC = INT

Then the knob controls the longer exposure times for dim objects.

In practice, I hardly ever take the camera out of "deep sky" mode. I just turn the knob all the way back and flip the SYNC back to VBS when I shut down for the night so I have fast exposures for setting up the telescope the next time out. So, before I shut the camera off I make sure the main menu screen looks like this:


And then I shut everything down and pack up for the night.

Gain (AGC)


With exposure out of the way, the next thing to talk about is gain, or AGC. Setting the AGC tells the camera how much amplifier gain you would like it too apply to the signal coming out of the CCD. It's similar to cranking up the ISO setting on your digital camera. To get the AGC you navigate the main menu to the AGC setting and use the buttons to set it to manual:


Then you can use the secondary menu to set the gain level:


There are two rules for setting AGC:

1. Set it as low as you can. Lower AGC will give you cleaner pictures at the expense of a longer exposure time. Higher AGC will let you use shorter exposures at the expense of more noise. Where you set this depends on how well your telescope can track and how long you want to wait for new pictures. I generally just put it close to the middle except for short exposure work, where you just turn it off.

2. You cannot reset the AGC while Hyper mode is on and the camera is going an extended exposure. You must flip SYNC back to VBS, set your new gain level and then re-enable the Hyper mode. If you don't do this, the camera can get into any number of odd states, at which time you reboot it.

Other Image Parameters


When using the Mallincam, you use exposure and gain to set a baseline for your image. But, the camera also gives you a few other settings to fine tune color balance, sharpness and gamma.

Color balance is controlled with the "W/B" menu. This menu has two automatic states and one manual. The automatic states are called ATW:


and AWC:


I'm not sure what the origin of these terms is. The manual state allows you to open up this menu where you can set your own red/blue sliders:


This menu also lets you set what I guess is tungsten (3200K) or daylight (5600K) preset white balances.

The Mallincam also has a setting called APC that lets you manipulate sharpness and the rendering of fine detail. You get to the APC menu through the options screen. First navigate to the OPTION menu and hit the center button to see this:


Then go to the last entry, and hit the right button so it says NEXT:


Then hit the center button to enter the magic second options menu:


Finally you can set the APC parameters in the APC menu off of this second options menu:


Pushing these sliders to the right increases the effect of the APC. To me, the effect is much like unsharp masking. Don't use too much of this because it can make the image look strange and noisy.

The option menu contains several other functions that I am not going to cover here. I will note though that you might have reason to mess with the GAMMA setting. Generally for deep sky stuff you set this to 1.0 to get the darkest backgrounds. But, there is a second setting if you need a lighter picture for some reason.

Cooling


The final camera parameter that you might want to manipulate is the one that controls the cooling system. The Mallincam uses an adaptive cooler that has two parameters: how aggressively to cool the CCD and how often to check and see whether the sensor needs to be cooled. Curiously, you set these parameters from the MOTION DETECT menu even though it's not clear what this has to do with motion detection. This menu looks like this:


The slider controls the level of cooling. The right side of the slider represents minimal cooling. As you push the slider left the cooling gets more aggressive. The timer controls how much the cooler runs. The timer has three setings: 10 seconds, 30 seconds and 60 seconds. Rock recommends that when you first turn the camera on, you set the time to 60 seconds and the level all the way right. This is a gentle level of cooling. As you use the camera more, you can set the timer to 30 or 10 seconds and the level further to the left.

If you turn MOTION DETECT off altogether from the main menu then the cooler runs all the time. I gather that you should be careful about doing this, but I don't understand the hardware well enough to know why.

Using the Mallincam Software


I have not personally used this control program, but others have. It has some convenient presets that set the camera up for planetary or deep sky. The meat of the program is the main settings screen though, which looks like this:


All of the various sections of this form should look familiar to you now. They set most of the same things as the camera menus did above. But, if you have a computer you can do it without needing to navigate the menus on the camera. The one thing you can't use this interface to use is to set exposure. For this you still have to use the knob on the VSS+ because it's the only thing that is hooked up to the exposure system

There is also a new control program for the Mallincam Xtreme. In addition to the regular settings it can also be used to set exposure directly.

You can find more information about this software in this article by Jack Huerkamp. In addition, you should also read this excellent review by Jim Welisek and also this other excellent review of the Xtreme which is also by Jim.

Putting it all Together


Now we're ready to take the camera outside. I have the following routine:

1. Set up and align the telescope as before with an actual eyepiece. I just find it easier to do it this way. My telescope does not track before it is aligned, and keeping everything centered in the camera while staring that the TV or computer screen was too nerve racking.

2. Replace the eyepiece with the camera. Hook up the power to the camera and hook up the video cable to the camera and whatever TV or computer is going to capture the image. If you are using a computer to capture the images, you'll need extra hardware to convert the analog video to digital frames. I'll cover that in the next article.

3. Focus. I have not talked about focus, but it's pretty easy. First, buy a Bahtinov mask and read a web page on how to use it. Put the mask on your telescope. Put the camera into the 2.1 second exposure mode and turn the focus dial until the diffraction pattern on the screen looks right.

If you don't have the mask, focus on a bright star or better yet, a bright cluster of stars. As you come towards best focus you'll notice dimmer stars will being to appear in the field. A good indication that you are close to focus is when no more dim stars appear, but none disappear either.

4. Point the telescope at something interesting. Right now The Orion Nebula is still conveniently visible. The screen will show you if the telescope pointed well. Use the hand controller to center it, then put the camera into Hyper mode. Remember the SYNC setting:


Wait 5 seconds. You will then see more on the screen. Turn the exposure knob clockwise a bit. With a 10 second exposure in my 8 inch SCT, I got this:


I have to say that this made learning the odd interface worth it.

Next time: All the other little details, and how to spend the rest of your yearly income to defeat periodic error.

Appendix and References


Most of the material presented here was inspired by a short tutorial session that happened on one of the NSN broadcasts one night. After watching that I figured it would be fun and useful to record the most important classes of menus settings that you can make on the camera.

As I said above, my camera is the Mallincam VSS+. It is slightly different than the earlier MCHP (Hyper Plus) model and the newer Xtreme model, but the main differences are in how you set exposure in Hyper mode. For the MCHP, all the camera menus are the same except for the cooler, and you set exposure (and cooling) using switches on the body of the camera. For the Xtreme, all the camera menus are the same except the VBS SYNC mode is never used and you set exposure using either the Windows software that is specific to the Xtreme or using a wireless remote control.

Much of what I covered on this page is also covered in one place or another in the various documents that you can download from Jack Huerkamp's web site. Jack is US distributor of the Mallincam, so if you are buying a camera in the states you'll be dealing with him.

I also recomment looking at the reviews of the VSS+ and the Xtreme on Cloudy Nights.

Finally, the Mallincam Yahoo group has a lot of useful reference information as well.

Wednesday, March 16, 2011

Tinkering with the Stars

Anybody who knows me knows that I am not a tinkerer. This may sound strange coming from a professional software engineer, but I've just never been very good at it. I never took things apart as a kid. I never built my own hardware back when you could still build your own hardware. I was never any good at assembly language. In fact, specifically because I write consumer software for a living, I have fairly high expectations about the required level of polish in the final user experience of such products. If I can't install your tool and make it work in three clicks, you are dead to me.

So lately I have surprised myself by taking on some telescope related projects that can only be described as tinkering. Telescopes are dangerously close to being the sort of finicky mechanical device that would have defeated me in the past. But, over the last 25 years or so they have slowly become more electronic and so, to me, more friendly. Still, you can't really say that the overall experience is polished. This is an industry still attached to the RS-232 cable. A lot of the most useful software packages are created by teams of one working in basements with Visual Basic or the Mac equivalent. If you are going to play in this world, you have to be careful.

Late this summer, I hit upon the end goal of setting up a system that I could use mostly from my house and mostly for the observation of deep sky objects. In particular, I wanted to take advantage of a new class of astronomical video cameras that make it possible to "see" more like a CCD camera does without a lot of the hassle of actual CCD imaging. One way do to this would be to hop on to the Internet and immediately pick up:

1. A Mallincam.

2. A large aperture telescope with a fancy computerized tracking mount.

3. A large windows PC to control the telescope and camera.

4. Five or six software packages of various kinds to handle telescope pointing, camera control, focus control, image processing, wireless connectivity with the telescope and video broadcasting of the video images.

5. An observatory building.

6. A small windows PC to remote control the large Windows PC in the observatory.

This would have been a phenomenal outlay of cash. More importantly, after two months of being buried under the weight of all the equipment I would have either thrown it in the basement or sold it off on the Internet for a loss and gone back to taking bad digital pictures or riding my bike slowly. If you spend any time at all looking at telescope related classified ads, you notice that by far the majority are of the form "I bought all this stuff and I never used it" or "I bought more stuff than I'll ever use, and I'm selling it all to get something even bigger which I will sell in a month." In fact, I bought the scope used from a guy who was "upgrading", and I caught the same guy selling his new scope a few months later. So, I knew this was a bad plan.

The fundamental rules when dealing with unfamiliar technology are:

1. Know what your end goal is.

2. To minimize risk, add only one technical requirement to the system at a time.

The obvious first step in this was to figure out the telescope. Besides the camera it is the most expensive and most complicated piece of equipment in the whole stack. I went out into the Internet with the following telescope requirements:

1. Not too big.

2. Not too small.

3. Not too expensive.

4. Easy to set up.

5. Good automatic pointing.

These requirements are a good baseline for my definition of a minimally useable telescope. It also turns out that they are critical for effective use of the video camera, but I'll get to that later. Finally, in a turn of good fortune, it also turns out that the modern consumer telescope has been engineered with these specific requirements in mind. It doesn't matter what kind of tube you buy, you can probably stick it in a system that is streamlined to set up and can do computerized pointing. Even the Dobsonians do this now.

After some deliberation, I picked an orange tube 8 inch Celestron. This was, no doubt, a choice driven partly by misty-eyed nostalgia. Back when I was growing up Celestrons were the commercial telescope. They seemed completely out of reach to me. An expensive toy for rich folks (although the really rich folks bought Questars). Anyway the telescope ended up working very well. I can set it up in ten miinutes. It points relatively accurately. It's easy to use, if a bit primitive.

Telescope in hand, the next step was software. Generally my rule is: when in doubt, avoid software. Since I write the stuff for a living, I feel qualified to say that unless you already know it will do exactly what you want and exactly how you want to do it, software will usually just get in your way. So if you have a choice between direct control and software control, direct control is better. This has mostly proven to be true with telescope software. There are two main issues with telescope software:

1. It mostly runs on Windows. I hedge by using VMWare. But still, this is less than optimal.

2. A lot of it is written by amateurs. The market is full of byzantine installation and packaging schemes (like the skychart program that makes you install all the extra star catalogs by hand unzipping them in the right part of the file system, really?) and user interfaces that are straight out of the Visual Basic form builder (I'm looking at you EQMOD).

But, I don't mean to disparage their achievements. The good stuff is executed at a high standard, and even the clunky stuff can have a lot of utility (like EQMOD). After a few false starts, I settled on SkyTools for charting and observation logging under Windows, Equinox as a basic planetarium program on the Mac side, Stellarium as a secondary plantarium program (it's open source, and so more flakey than the others), and finally, SkySafari on the iPhone and iPad, although this gets less use than the others.

Surprisingly, after experimenting with the wireless mount control in SkySafari, I found that I didn't like it. I'd rather hit the big buttons on the hand controller. I've also had mixed luck controlling the mount directly from my laptop. So while I will bring the computer outside with me to reference charts and whatnot, I don't actually point the telescope with it. The mount is not quite accurate enough for that, and making small adjustments is much easier with the controller than with the laptop, especially when I'm staring down into the eyepiece anyway.

One of these days I'll get around to setting up Nexremote for this. And maybe I'll try to use those bluetooth serial adapters too. But for now the "one requirement at a time" rule kicks in, and so it's time to stop.

After a couple of months with the telescope I had settled into the following routine. If the weather looked good (which is fairly rare in Pittsburgh) I would make a list of objects to look at in Skytools. Then I would set up the telescope, align it, and bring the laptop out with the screen dimmed and work through the list one by one. If I felt like playing around, I'd also hook the scope up to the laptop and point with Skytools or NexRemote but I have really only experimented with that a couple of times, and both times the telescope ended up acting funny by the end of the night. Having worked through about 50 Messier objects and a couple of dozen others out of the NGC catalog, I felt comfortable moving to the next step. So I ordered the video camera.

But that's the subject for the next article.

While you wait for it, you can indulge yourself at Cloudy Nights, Astromart, and of course, Uncle Rod's blog. Read Rod's book about SCT telescopes too. It will make you want one.

Thursday, October 14, 2010

A Telescope In The City

I never expected to get back into telescopes. While they were my first hobbyist love and contributed indirectly to my final choice of career, the time of my real interest had long passed by. It also does not help that I live in the suburbs under a semi-permanent light dome coming from Pittsburgh. So no one was more surprised than me to be sitting in my back yard last night under a beautifully clear sky, peering once again into the darkness at the faint fuzzballs.

Let's get one thing out of the way first, so the point does not get lost. An 8 inch Schmidt-Cassegrain telescope really is the perfect instrument for someone like me: an overly affluent dabbler. Aside from the comparatively modest cost, it has three characteristics that make it great:

1. Relatively large aperture. This thing has four times the light gathering area of the Astroscan of my youth.

2. Relatively portable size. The optical tube of the telescope is about the size of a small child, and about as easy to carry. More importantly, it's small enough to be easy to store. I was really worried about this and for once the thing ended up being smaller than it looks in pictures.

3. An automatic, computerized mount. We should talk more about this now.

The fact that the telescope has a computer that can accurately point at specific locations in the sky is simply invaluable. This is especially true in the suburban environment, where the sky glow would make it impractical to use even a large finder scope to "star hop" to you what you want to look at.

My main worry about this was how onerous the alignment process might be. Before the telescope can point at things, you have to tell it where it is. The quickest way to do this is as follows:

1. Turn the telescope on.

2. Point it at a first known star. You have to do this by hand. Put the star in the eyepiece and hit a button on the controller.

3. Now the scope goes into a slower pointing mode so you can center the star in a higher power eyepiece. You do this very carefully. With Celestron telescopes, you also try to only move the star using the right and down buttons on the controller. This apparently helps to align the gears in the motor drive more effectively. When you are done, you hit the align button again.

4. Now the telescope suggests a second star to point to. It goes there by itself, but it will probably miss. You then repeat step 3 for the second star.

5. Now you are done.

If you have done your work well, my telescope (a Celestron 8SE) will now point accurately enough to put the object into the field of view of my 120x eyepiece. Right now that field is only around a third of a degree in diameter. Not bad. Even better, after you hit a target, the scope will automatically track it. You can leave the thing in the yard while you warm up in the house and then walk back out and have it still be in your 120x eyepiece. This is much more cool than I thought it would be.

Happily for me, it did not take much practice to figure out how to obtain this level of performance. Sadly for me, I got a lot of practice at this because the power cable on the telescope kept falling out because Celestron never fixes their stupid power connectors. Every time the cable falls out, you have to do the two star dance again. It only takes four or five tries to get good at it. Then I learned to put batteries into the telescope as a backup against the stupid power cable.

My other complaint is that the actual interface on the controller is ludicrously primitive. For example, if I want to see the Andromeda Galaxy, I have to type "M 0 3 1". The stupid thing is not smart enough to actually parse integers for me. The menu system is also strange and hard to work with, especially since you only get to see 2 lines of text at a time. These interface problems are emblematic of an industry that is selling its main product (telescopes) on so little margin that actually investing in improving the interfaces is both too expensive and too risky. I mean, for god's sake they still use RS-232 ports.

But, I will forgive them these foibles, because the way I find things now is to point the telescope at the object and then compare what I see in the eyepiece to a known chart. I can look the object up on my iPhone and have the phone display a chart of what should be in the eyepiece. As an aside, this is much nicer than fumbling with printed star charts. The StarMap Pro software is even smart enough to generally orient the eyepiece field correctly. And the iPhone screen, when it's mostly black, does not completely destroy your dark adaptation.

Anyway, with the telescope pointed and the iPhone holding the chart, I can then look into the eyepiece, and see if the stars look right. Then I squint and stare until the back of my brain starts to leak out of my ears, and I decide if I think I saw anything.

For relatively bright objects (M31, the big globular clusters, etc) it's usually pretty easy to pick out the faint fuzzy. Sometimes the view is even pretty impressive. More often than not though it's hard to know if you actually saw what you thought you saw. Which is why this particular night made me so happy. I jumped over to the galaxy M82, which I had tried to see a few nights ago, and I only noticed a faint hint of its existence. But last night it was obviously there. A dim gray cigar shaped cloud right where the StarMap chart said it would be. Its brighter partner, M81 was also an obvious cloudy object when I pointed the scope there.

Finally, the last major success of the night was tracking down the Comet Hartley 103P. I had missed it when it passed by Perseus before. But tonight it was easy to see, as it had become a bit brighter in the intervening time.

Tonight my squint and stare fest was reserved for M110, a small galaxy that is near the much larger and brighter M31. I spent about 20 minutes going from the iPhone chart to the scope and back again and I think I got the faintest hint of its existence but I'm not sure. I'm a bit more sure of this than I was of M82 the other night though, so that's a reason to be optimistic.

Overall this telescope has worked better than I ever imagined it would. More importantly, using it from a light polluted suburban back yard is more practical than I ever imagined it would be. I have a reputation for not being able to be pleasantly surprised by anything anymore, but here my friends is a counterexample for you. So there.

Extra Notes

I never would have gotten this far without the excellent writings of "Uncle Rod" Mollise. His weblog is good. His books are good. They made me believe the hardware would work for me.

One of the best things about amateur astronomers is that they are still relatively cheap people. You also have to love a hobby where a $300 lens (eyepiece) is considered to be staggeringly expensive. I'll be ordering a couple of fancy eyepieces I think. Gotta see what the fuss is about. While I'm at it, I think one of those astronomical video cameras needs a home too.