Consider the following photograph of a regular terrestrial scene (as they say in the astro-photo biz):


Astrophotographs are not like this. Here is a typical frame out of a CCD camera:

Here is the histogram:

The goal in processing this image is to take all the bits that represent "signal" (that is, stuff you want to look at) and make them bright. The main problem is that there are all kinds of bits that we don't want to see ("noise") that will become visible when we make all the dim things bright.
To give you an idea of what I'm talking about, in the following frame what I've done is to push the levels of the picture to increase the brightness and contrast:


There are various problems:
1. There is a lot of background noise, which we have amplified by pushing the levels so hard.
2. There are various optical problems. You can see dust in the optical system.
3. There are hot pixels and other noise related to dark current.
4. You can't really see it in this example, but there is a gradient over the entire image related to light pollution in my back yard. Generally my sky is darker to the east and brighter to the south and west.
If I had to sum up astronomical image processing in one sentence it would be: "the art of making the signal bright, in a pleasing way, while hiding the noise without being obvious about it." That is, we want to use as many tricks as possible to make the galaxy bright and pretty while avoiding the trap of also showing you all of the problems in the image.
In my previous post I lamented that these and other issues were almost impossible to fix with the video camera. With a CCD still camera it's still hard, but it's much more doable.
There are several tools available to the CCD user to remove background noise from an image while retaining detail. These fall into three general strategies:
1. Any single exposure will probably be short enough to be noisy, so combine average many noisy exposures to smooth out the final result.
2. Use the CCD calibration tools that are available to you (see below).
3. Smart post production can make a big difference.
The first item speaks for itself. Take as many exposures as you can stomach. I tend to work in two modes. If I am just exploring new objects to see what they look like I'll take just a few exposures and live with noisy images. But if I decide to really go after a favorite object, then I'll take as many exposures as I can, possibly over several nights to try and minimize the final noise profile.
The second item takes more explanation. CCD "calibration" refers to post-processing your images to remove noise that is generated by either the CCD hardware itself or your optics. Recall from before that the main issues here are dark current and read noise.
Dark current adds noise to a picture by causing the CCD wells to register "signal" that did not come from light hitting the sensor. Luckily, there is an easy way to compensate. Say you are taking 3min exposures of your object. Then what you do is take a frame with the sensor covered up that is exactly 3min long with the CCD at the same temperature. On average this "dark frame" will contain just the noise generated by the dark current while you were shooting your 3min frame. So, you just subtract the dark frame from the original image and you are done. Right?
Actually, it's not quite that simple. CCD images also contain a lot of random noise (read noise, noise in the dark current, etc) that is different for every frame. So if you just took a single dark frame and subtracted it you would be adding this random noise to your picture, which isn't great. The solution is to shoot many dark frames and average them together. This smooths out the random noise and leaves a more consistent noise profile behind.
In addition to dark frames, one will also collect "bias" frames, which characterize the minimum signal level, or offset in each frame that you shoot with the camera. A bias frame is basically a zero length dark. Again, you take a couple of dozen of these and average them together to minimize read noise and such. If you take very short flat frames (see below) you can use bias frames to effectively do "dark subtraction" on them, since the dark current will not be significant. You can also bias-subtract your darks which allows you to scale the darks to different exposure times. I personally have not tried to do this.
Darks and bias frames let you minimize the noise introduced into your pictures by the CCD itself. We take many such frames and average them together to smooth out the parts of the noise that we can't capture directly. The read noise is a good example of this sort of noise. Read noise will be in every shot you take, you can't get rid of it because you can't capture it. Even doing dark subtraction just adds the read noise that you couldn't get rid of in the dark frame into your lights. This turns out to be why the CCD people take so many exposures (72 hours on the Horsehead nebula!!). The more you take the more you can minimize the bad parts of the noise, leaving your signal behind.
What's left to deal with are defects generated by the telescope itself. In our example these are easy to see:
1. Uneven illumination caused by light falloff in the optical train.
2. Shadows caused by dust.
There are various techniques for automatically removing these problems using "flats". The idea is that you point your telescope and camera at a perfectly uniform light source and take an exposure that exactly hits a mid-tone on the sensor. Then you shoot dark frames at the same exposure ("dark flats", or "flat darks?"). Then you divide the resulting data out of your exposure frames.
Personally, I take a different approach to this. First,I am too lazy to shoot flats. Second, since I'm shooting from my yard, I have a lot of gradients caused by light pollution, so I need software tools to deal with these. Such tools will generally also deal with gradients caused by uneven illumination. So I just do that. There is a piece of magic software called Pixinsight that does a very good job modelling and removing gradients and other background noise. I've gotten by just using a software solution for now. It has generally worked OK. But I may break down and actually shoot flats at some point.
As for dust … I've had reasonable success just cloning it out in Photoshop. I don't have that many dust shadows. The bigger ones are harder to remove, and if I had more of them I'd probably learn to shoot flats.
So, here is the workflow for your basic black and white CCD image.
1. Shoot as many "light" frames as you can stand. Averaging many frames reduces the noise inherent in the image itself.
2. Cover up the telescope (or get a CCD camera with a shutter) and shoot as many dark frames as you can stand. 10-15 is usually enough. This will minimize issues with dark current noise, hot pixels, and read noise which are all caused by the CCD sensor.
3. Shoot flats if you want to. This will help minimize defects caused by your optics.
Now load all this up into your favorite imaging software (Nebulosity, Maxim) and tell it to calibrate your frames. When you are done, you'll have nice clean single frames. Now use the same software to register and "stack" these frames. The result will be a single combined image that you can then stretch out to bring up the detail. The amount of noise you have left will depend entirely on how long your exposures were. This, in the end, will determine how much detail you can pull out.
Here's the final version of the example object that we started with. The blacks here are actually clipped because I was not that good at this yet.

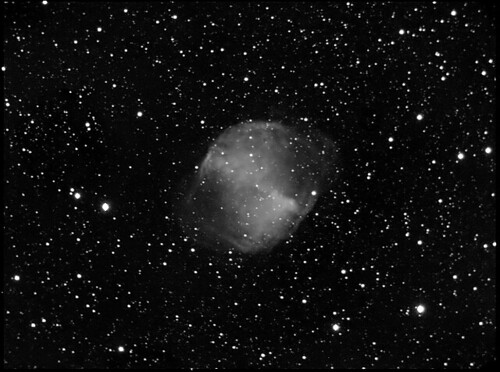
1. I can't expose more than around two minutes at once because even the awesome mount I bought can't go much longer without noticeable tracking error.
2. I was not that good at the post-processing tools yet.
Next time we'll see how one can progress past these issues mostly by spending more money.